
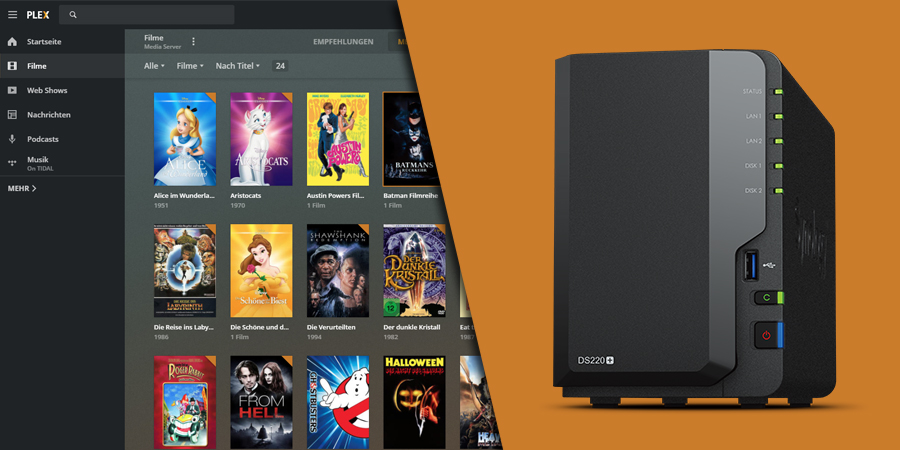
With the Video Station, Synology already offers a video streaming server including a playback client. Video Station has a great user interface and is easy to use. Unfortunately, the Video Station is a little weak when it comes to compatibility of audio and video formats. The Plex Media Server is an alternative. It looks similar to the Video Station and is also easy to use and different formats and codecs are no problem for it. In this article I will explain to you how to install and set up Plex on your DiskStation.
Important for DSM 7
Though Plex is available as a package in the Package Center, with DSM 7, some elements of Plex had to be fundamentally adjusted. The release process for third party software seams too cumbersome and slow, so Plex deciced to not update the package in the Package Center as regularly. Download the package directly from the Plex homepage: https://www.plex.tv/media-server-downloads/ (Attention: There are different packages depending on the processor of your DiskStation and the DSM version).
With DSM 7, user and permission management for system users has changed. Plex no longer uses the user and shared folder Plex but rather PlexMediaServer. The user is no longer a “local user” but an “internal system user”, but more on that later.
If you have Plex installed on DSM 6 and update to DSM 7, Plex cannot be updated afterwards. You have to migrate Plex, the process begins before the update to DSM 7. You can find instructions in the Plex forum. Otherwise you will have to reinstall.
Plex is available for many DiskStation models. However, keep in mind that streaming videos requires a lot of hardware resources and even if Plex can be installed on your model, smooth playback can cause problems (similar to Video Station’s video transcoding, which is available on many models but not enables smooth video playback on all of them). Also consider which other tasks your DiskStation performs and how busy it is. I had Plex running on a DS218+ (Intel CPU), which also ran Nextcloud and other tasks. But my older and especially weaker DS215+ (ARM CPU) was also able to stream videos smoothly with Plex.
Bonus chapter: Media management
There are some important points to note here:
- The Plex developer warns about saving media data in the installation folder (PlexMediaServer). A separate shared folder must be used for media data.
- The Plex developer recommends using your own shared folders and not the system folders /video, /photo and /music. Problems are said to arise again and again over which the developer has no influence.
- Movies and shows must be stored in separate folders. Separate shared folders are not required, a shared folder with separate subfolders can be used.
Before we get started, I’d like to make a little digression on the subject of media management. First there is the folder structure. How and where you store your movies and shows is relatively free to you. But note the points stated above. It’s best to create a new shared folder with subfolders for movies, shows and music. It is important not to put shows and movies in the same subfolder. Media servers (no matter which one) manage shows slightly differently than movies. Shows are displayed as such, including seasons and episodes. So that the media server knows whether it is dealing with episodes of a shows or single films, media libraries of the movie or shows type are created. Folders are then assigned to the media libraries. If you had movies and shows in the same folder, the media server would try to process the episodes of the shows in a movie library and vice versa.
The second big and, above all, really complex and annoying issue is the naming of the files. While the file name is irrelevant, especially for audio files, as the title, artist, etc. are read from the metadata, media servers use the file name for movies and shows to search for detailed information on the Internet.
Movies
Movie files can be placed in their own subfolder. This makes sense if you have additional material such as movie posters, subtitle files or bonus material. However, subfolders per film are not required; you can store all movies in one folder. So that films can be processed correctly, Plex provides the following naming scheme:
Movie-Name (Year-of-Release).ext
/Movie-Name (Year-of-Release)/Movie-Name (Year-of-Release).ext
/Movies
    Avatar (2009).mkv
    /Batman Begins (2005)
        Batman Begins (2005).avi
        Batman Begins (2005).eng.srt
        poster.jpg
The year of release is important because there are many movies with the same name, remakes, live-action adaptations, etc. The naming scheme for movies also applies to other media servers such as Kodi or Video Station. You can find more details in this article from Plex.
TV Shows
Episodes of a show must be stored in one subfolder per show. A subfolder per season is not necessary, but if you use one, they must be called “Season XX”. The following naming scheme results for shows:
/Show-Name/Show-Name SXXEYY optional Text.ext
/Shows
    /The Orville
        The Orville S01E01.mp4
        The Orville S01E02.mp4
The year of publication is not required here, but it helps if there are several shows with the same name. The episode title is also not necessary; Plex retrieves it from the Internet and adds it. However, you can attach the title or other information as optional text. This format is also accepted by all common media servers, even by the Video Station, although this format requires a period before and after the season information in the scheme. You can find more details in this article from Plex.
Renaming episodes of a show can be very tedious, especially if the season and episode information is not available. Especially with older, foreign shows (especially animated series that were shown on TV), the episodes are simply numbered and no seasons are specified. This is because series that have already been completed are often bought as a whole or several seasons at a time and then broadcast. Seasons had no meaning because they couldn’t be released in one go, as VHS tapes only had space for a few episodes. In other countries, shows were often classified differently, seasons were shortened or only divided into seasons when they were re-released. If you have any problems, check TheTVDB.com to find out which seasons and episodes a series is divided into.
Even though renaming a large collection can be very tedious, the effort is worth it. Although you can subsequently correct the movie information in the media servers, the effort required per movie is higher than renaming it. The changes are also saved – depending on the media server – in metadata files or in the server’s database. If you change the server or don’t have a backup and set up the server again, you have to start from the beginning. The Video Station in particular is difficult here because it cannot create a backup. The metadata can be exported but can no longer be imported. Once you have named your files correctly, you will save yourself a lot of work in such cases.
Plex Media Server installation
Download Plex from the website, selecting the correct CPU architecture and the correct DSM version.
Plex from the Package Center
As mentioned above, the version in the Package Center might be quite outdated. Use the version release on the Plex website for installation and also manually update Plex.
Open the Package Center on your DiskStation and click Manual Install and then Browse. Select the downloaded file on your computer and click Next. Accept the installation of third-party packages, select “Normal installation”, select the volume on which you want to install Plex, deselect “Run after install”, and click Done. After the installation is complete, you will receive a note about the permissions that Plex needs on the shared folder. We’ll take care of that right away.
Beware the access permissions
If you have configured your DiskStation’s firewall, you need to make sure to regulate access to the port. You won’t find Plex in the port selection list, so you have to enter the port manually. Plex uses port 32400.
During installation, Plex created its own user and a shared folder that contains the server software. Open Control Panel > Shared Folder in DSM.
If you have not yet created a shared folder for your media, click Create > create shared folder. Otherwise, select the shared folder in which you have stored your movies/shows and click Edit.
In the Permissions tab, select System internal user in the dropdown. There you will find the entry PlexMediaServer, assign the user read and write permissions.
Plex Media Server setup
Once you have assigned the permissions, you can finally set up Plex. To do this, run the Plex Media Server. To do this, open the Package Center and select Run at the Plex entry. You can access the media server via the Package Center or via the created shortcut. The URL that you used to access DSM when you installed Plex is used. Plex uses port 32400. You can access the web interface together with the port via any URL under which your DiskStation can be reached in the LAN, regardless of whether it is DiskStation name (e.g. https://myDS:32400), DynDNS (e.g. https:/ /myds.synology.me:32400) or via your own domain (e.g. https://plex.myDS.com). You can read more about DiskStation, DynDNS and your own domains in this article. Only a few steps are necessary to set up Plex.
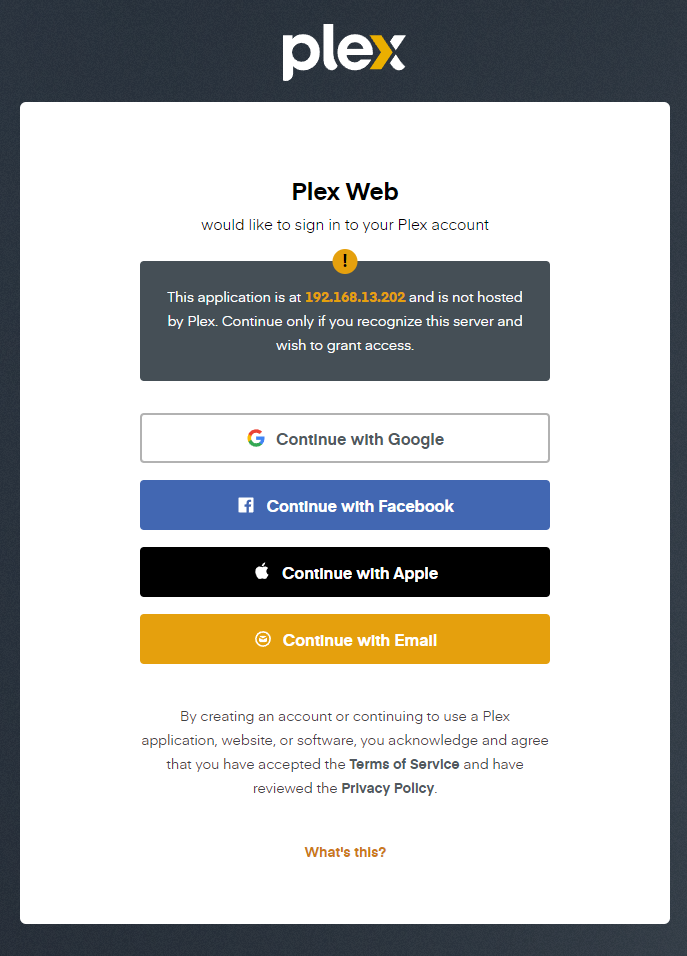
The web interface presents you the setup wizard. To do this, you need to log in with a Plex account or register an account if you don’t already have one. Accounts from various providers are available to you, or you can use the classic method of using your own Plex account via an email address. You also have the option of not using an account for the time being (skip). You will then be informed of the restrictions and can accept them and continue without an account.
In the next steps you will be briefly explained how Plex works and of course you will be offered the Plex Pass. You can use Plex in the free version to stream your own movies without any restrictions. A Plex subscription is therefore not necessary. Of course, you can also buy a subscription if you want to take advantage of the additional offers.

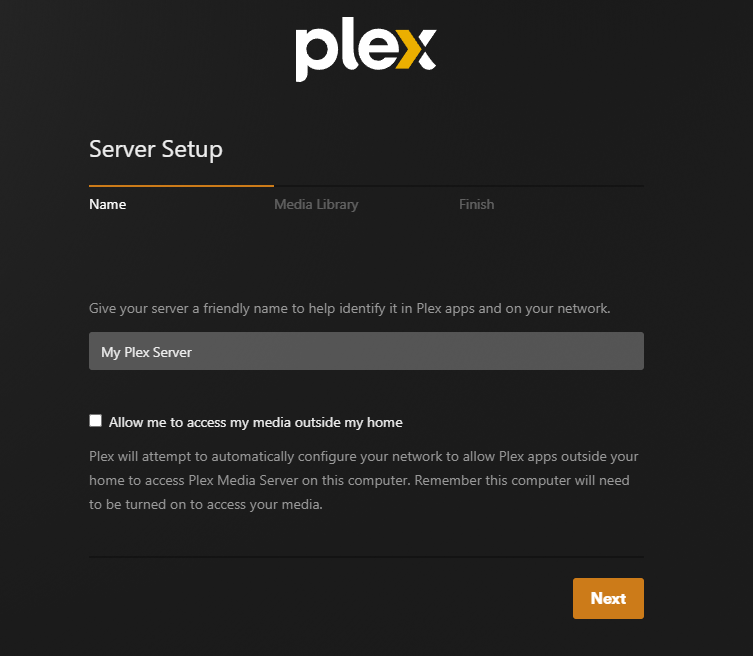
In the next step you can give your Plex server a name. At this point you can also activate external access.
External access for Plex
I usually recommend skipping automatic configurations and doing them manually. Unfortunately, Plex does not support manually configuring external access. If you activate external sharing for Plex, the server will be stored in your Plex account together with an open port (you have to enable this yourself in the router). If you log in to a Plex client with your account, the client automatically receives the server data. There is no manual entry on the client.
Click on Continue.
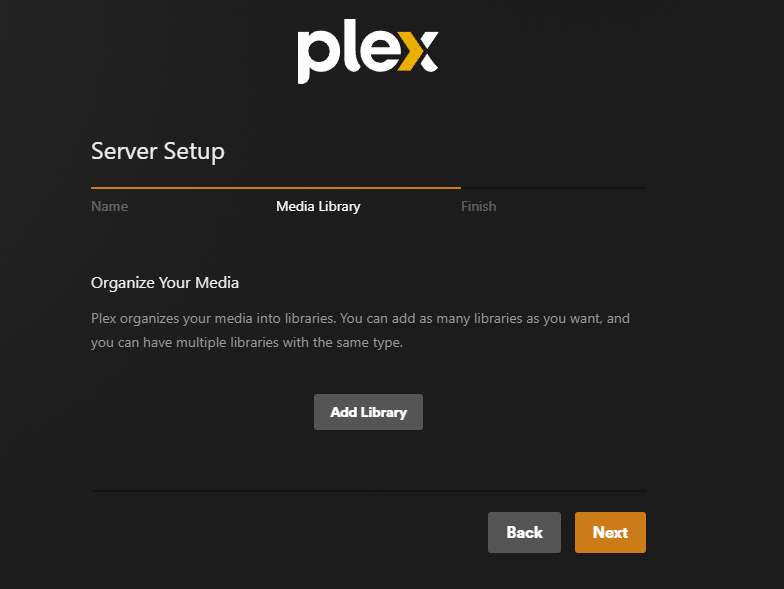
Now it’s time to create the media libraries. Click Add Library.
In the first dialog you select the type of media library. This is important because depending on the type, the media files are analyzed and processed differently. Therefore, you should also store movies and shows in separate folders. Also select the desired default language (this influences which language the movie information is displayed in and which default language is used for subtitles). You can also customize the name of the media library.
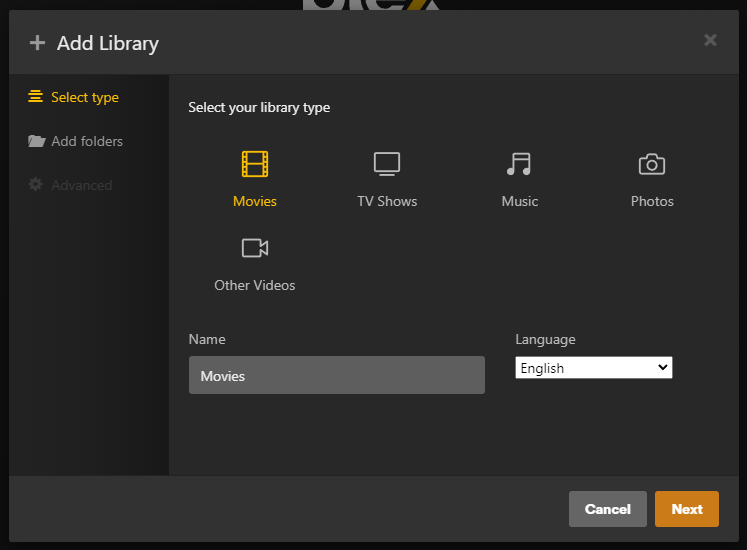
Multiple libraries
By the way, you can easily create several media libraries of the same type. For example, you can create a media library for series and a media library for animated series. This is a big advantage over Kodi, where several folders can have the same type but all folders are displayed mixed together in the same menu item. Kodi requires a lot of tinkering before multiple libraries of the same type are displayed separately.
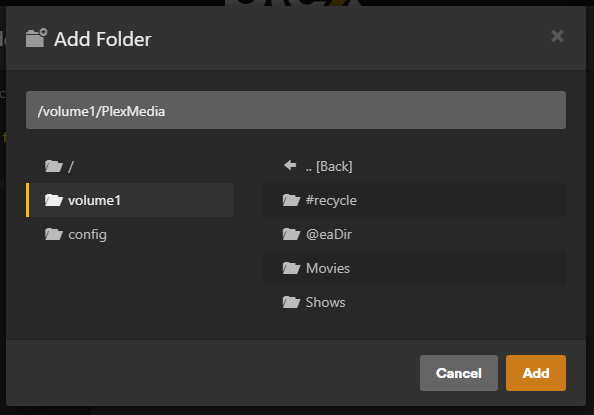
In the next step you have to select the desired folder. You are not tied to the shared folder, but can navigate in the subfolders. Once you have selected the desired folder, click Add.
Hint
In the selection you can see all shared folders, including those to which the user PlexMediaServer does not have permissions. However, these folders do not display subfolders. The media server will not find any media files in the shared folders without permissions.
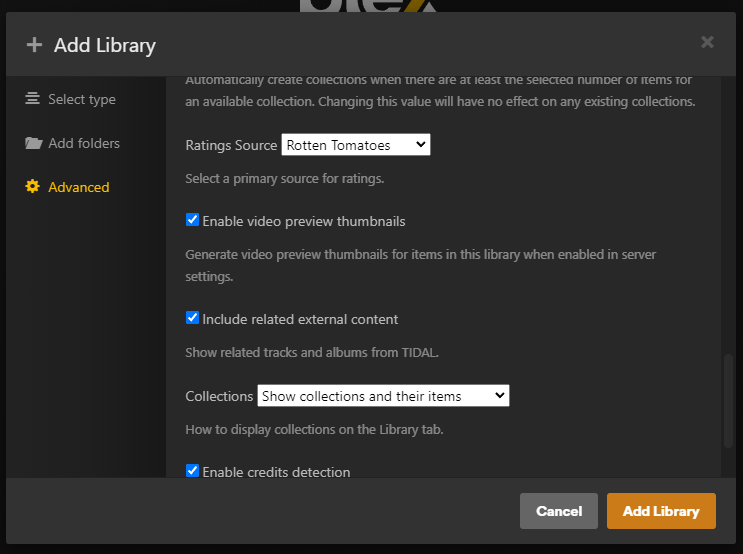
(Optional) Under Advanced you will find further settings for the media library, such as how to handle bonus material or which page should be used to access movie information. The options “Localized title” (if the option is deactivated, the media library shows the original titles of the movies, regardless of which language is set for the media library and in which language the movie is available), “Rating Source” (Rotten Tomatoes is known, that their ratings often differ a lot from user ratings) or the presentation of collections, i.e. movie series (movies that are part of a series are grouped together in collections, even if there is only one film in the series in the media library) could be particularly interesting here. Available as an option: show collections and their items. This can quickly become confusing. Hide items which are in collections (if movies are part of a collection, they are no longer displayed) or hide collections but show their items (collections are not displayed at all).
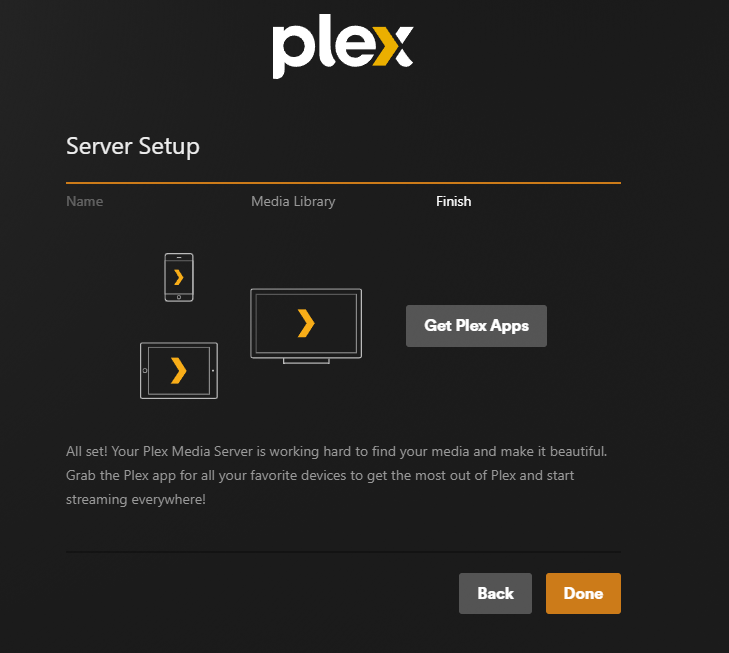
Once you have made all the settings, click on Add Library. Once you have created all the media libraries, you can click on Next. You can also add additional media libraries later in the media server settings. Plex also suggests you download the client. You can do this if you need the client on the device. Then click Done.
Plex will now begin browsing the selected folder and processing the media files. Depending on the size of the collection, this can take some time. But that happens in the background. You can now repeat the process for other media libraries.
Connect Plex clients with the media server
Connecting the client works the same everywhere and has nothing to do with your DiskStation. For the sake of completeness, I’ll explain that too.
The client is available for many platforms such as PC, Mac and Android. The Plex app is also available for Amazon’s Fire TV. To use the client, you must have a Plex account (Plex Pass is not required) and be logged in to the server with this account.
- Download and install the client on the desired platform.
- Launche the Plex client.
- Click on Login. A tab opens in the browser, confirm your registration there.
- The client will now automatically connect to the server.
- You can now customize the client and dashboard. Your media libraries will not be displayed automatically, you can now show them too. If multiple servers are linked to your account, you can change the server in the settings.
Update Plex Media Server
Plex will notify you when an update is available. If you had installed Plex via the Package Center, you would also receive updates there. However, Plex releases updates more frequently than they are delivered in the Package Center. I can only speculate whether only larger updates are offered via the Package Center or whether the submission process is too laborious.
Regardless of how you installed Plex. you can carry out a manual update at any time. However, versions can also be skipped.
No Way back
Once you have installed an update manually, you should stick to manual updates and no longer use the Package Center, as this can lead to problems.
To do a manual update, do this:
- Download the update via the update message. The correct package will be downloaded straight away and you will save yourself having to choose the CPU architecture.
- Open the Package Center and search for Plex Media Server.
- Stop Plex.
- Now click on Manual Installation. Select the file you downloaded earlier and install it.
- Once the installation is complete, you can start Plex again.
Conclusion
That’s it, your DiskStation is now a Plex Media Server and nothing stands in the way of your streaming pleasure, including video formats and audio codecs. Kodi is another popular alternative to the Video Station. I also tested Kodi myself but wasn’t happy with it. Although Kodi is customizable with themes and plugins, Plex doesn’t even offer themes. However, I didn’t like the basic structure of Kodi and most of the themes were way too cluttered. More clicks are also necessary before you can start the desired movie. I didn’t like Kodi’s basic menu structure (an additional menu level before I could select my libraries) and the configuration effort is enormous. Simple things such as multiple libraries of the same type can only be implemented with a few tricks and plugins. The performance didn’t convince me either. Kodi was very slow on my Fire TV Stick 4K and crashed often. Not all movies could be played back either. If the video track of the MKV file is compressed too much or the movie is not converted properly, Kodi will refuse to play or playback will be very jerky. Problems that I already knew from DLNA and the Video Station. Plex runs much faster and has never crashed. Playback always runs smoothly and even the problematic movies could be played.
Would you like more detailed step-by-step instructions for your Synology NAS, with a lot more background information, tips and tricks? Then get my knowledge as a comprehensive practical manual. You won’t find more information in any book about Synology and everything in the quality you always get from me.
Die 3rd Edition contains uptades for DSM 7.1 and the revised Web Station, Surveillance Station and Synology Photos.
The book directly from the publisher (German only).