Hint: This tutorial works also with Owncloud 8 and Owncloud 9 as Nextcloud 9 is a fork of Owncloud 9.
Preperation
- Before we can start, check if your Web Station is running.
- Next install following Packages from Package Center:
- PHP (5.6)
- phpMyAdmin
- MariaDB
- Create a new shared folder for you data. Nextcloud highly recommends placing your data folder outside of the web folder. This increases security and makes upgrading your Nextcloud installation easier.
- To allow PHP accessing the shared folder, you have to add the path to the open_basedir. Open the Web Station and go to PHP Settings. Add the folder path at the end of the open_basedir field. The : separates the individual paths.
- Enable the SSH service under Terminal & SNMP in the Control Panel.
Installation
- Get the newest Nextcloud version here.
- Upload the zip file to your DiskStation and extract it into you \web folder.
Security hint: You can rename the Nextcloud folder. This prevents Crawler from going through you web root looking after the standard folder.
- Change the permissions of the Nextcloud folder and the data folder for the installation. Create somewhere a script (text file with ending .sh) with the following content::
#!/bin/bash

chown -R http:http /volume1/web/Nextcloud/

chmod -R 777 /volume1/web/Nextcloud/
- Open putty and login with your user and password. To run as root enter sudo –i and enter your password again. Now run your script: sh /volume1/pathToScript/installPermissions.sh
Instead of the script you can enter the commands line by line but this is a lot of work and for a manual update you need to change the permissions again.
- Open Nextcloud in your web browser (e.g.: mydomain.com/mycloud or myDS/mycloud). The address you’re using during the installation is added to the allowed domains. If you want additional domains to be allowed, you have to enter them afterwards in the config.php file.

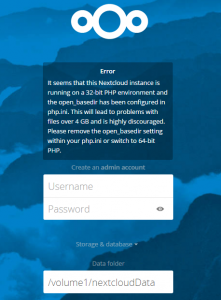
- The error can be ignored. Enter a username and a password for your Nextcloud admin. Expand the Storage & database settings and enter the path to your data folder.

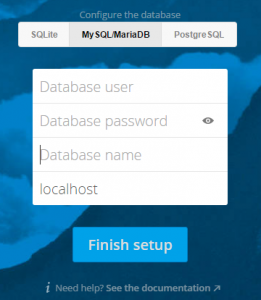
- Nextcloud uses SQLite as default database but SQLite is pretty slow, MariaDB is the recommended database. Enter the phpMyAdmin root user (or any other user that has the privileges to create databases). Nextcloud will create an own database user during the installation (the user has the same name as the entered admin user but with the prefix oc_). This user has all the necessary privileges to run Nextcloud and only this user is used. The root credentials don’t get saved somewhere and are only used for the setup.
- Click the button to finish the installation.
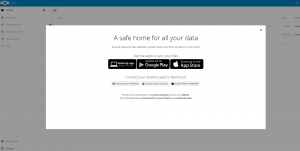
- After the installation is done you should see the web interface.

Next steps
Now you can install the desktop client or mobile apps to use your Nextcloud. Currently there is no official Nextcloud desktop app, instead you have to use the Owncloud desktop app. In the current state of development Nextcloud is compatible to Owncloud, therefore old apps are still compatible. An IOs and Android app is already available. Unfortunately there is no Windows Phone app.
It is possible that an error message pops up. On how to remove the most common errors and apply the standard security configuration, you can read in my next blog post.


hi there,
so this blog-post isn’t that fresh but i ask either way maybe you run i a similar problem with nextcloud install/update scripts on DSM6.2.
i get (Gateway Timeout Error 504) when updating due to a 60 second timeout in the nginx proxy synology uses for every vhost.
do you actually have an idea on how to raise this timeout setting?
— what i’ve tried:
added:
fastcgi_read_timeout proxy_connect_timeout proxy_read_timeout
to:
etc/nginx/app.d/server.webstation-vhost.conf
and
/etc/nginx/conf.d/main.conf
run script as CLI, totally doesn’t work because CLI php is another insufficient php version..
sincerely
Hi, I’m currently a bit busy but there is a possible solution for that. I will explain it in a few days, when I have some more time.
Regards
Andreas
I know this is a bit confusing. Since DSM 6 the DiskStation uses nginx as proxy, even if you use Apache as Webserver.
The timeout is comming from the nginx proxy.
Add or increase “proxy_read_timeout XXX;” (300 should be a good value) in /etc/nginx/proxy.conf and then restart nginx: “synoservice –restart nginx” in command line.
I had the same issue and this solved it.