
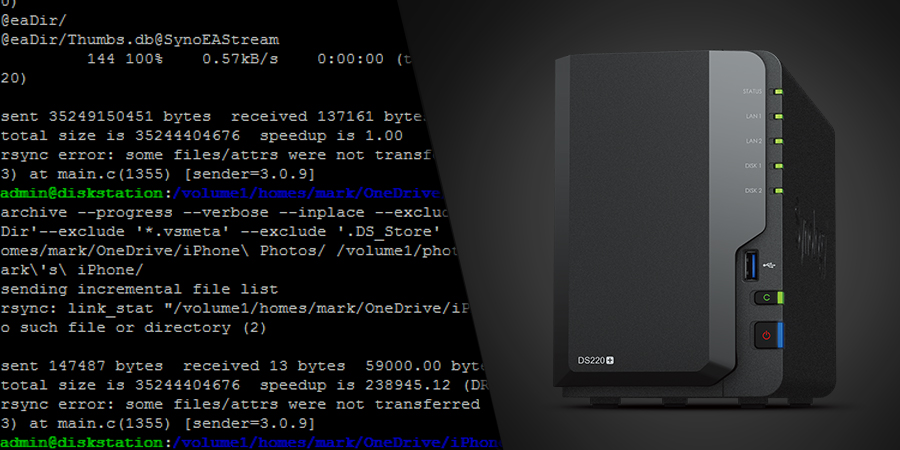
TeamViewer is a handy application for remotely accessing another computer, and it can be quite useful even for personal use: whether you’re accessing your office PC from your laptop elsewhere in the house—or even outside—or helping relatives with their computer issues. However, frequent use of TeamViewer may lead to being flagged as a commercial user, which disables free usage. While there are various alternatives, not all are as performant as TeamViewer, and some have adopted the same practice of flagging regular private users as commercial.
RustDesk offers a solution. This self-hosted remote desktop tool is open-source and free (Pro licenses are available for advanced features).
Server Installation
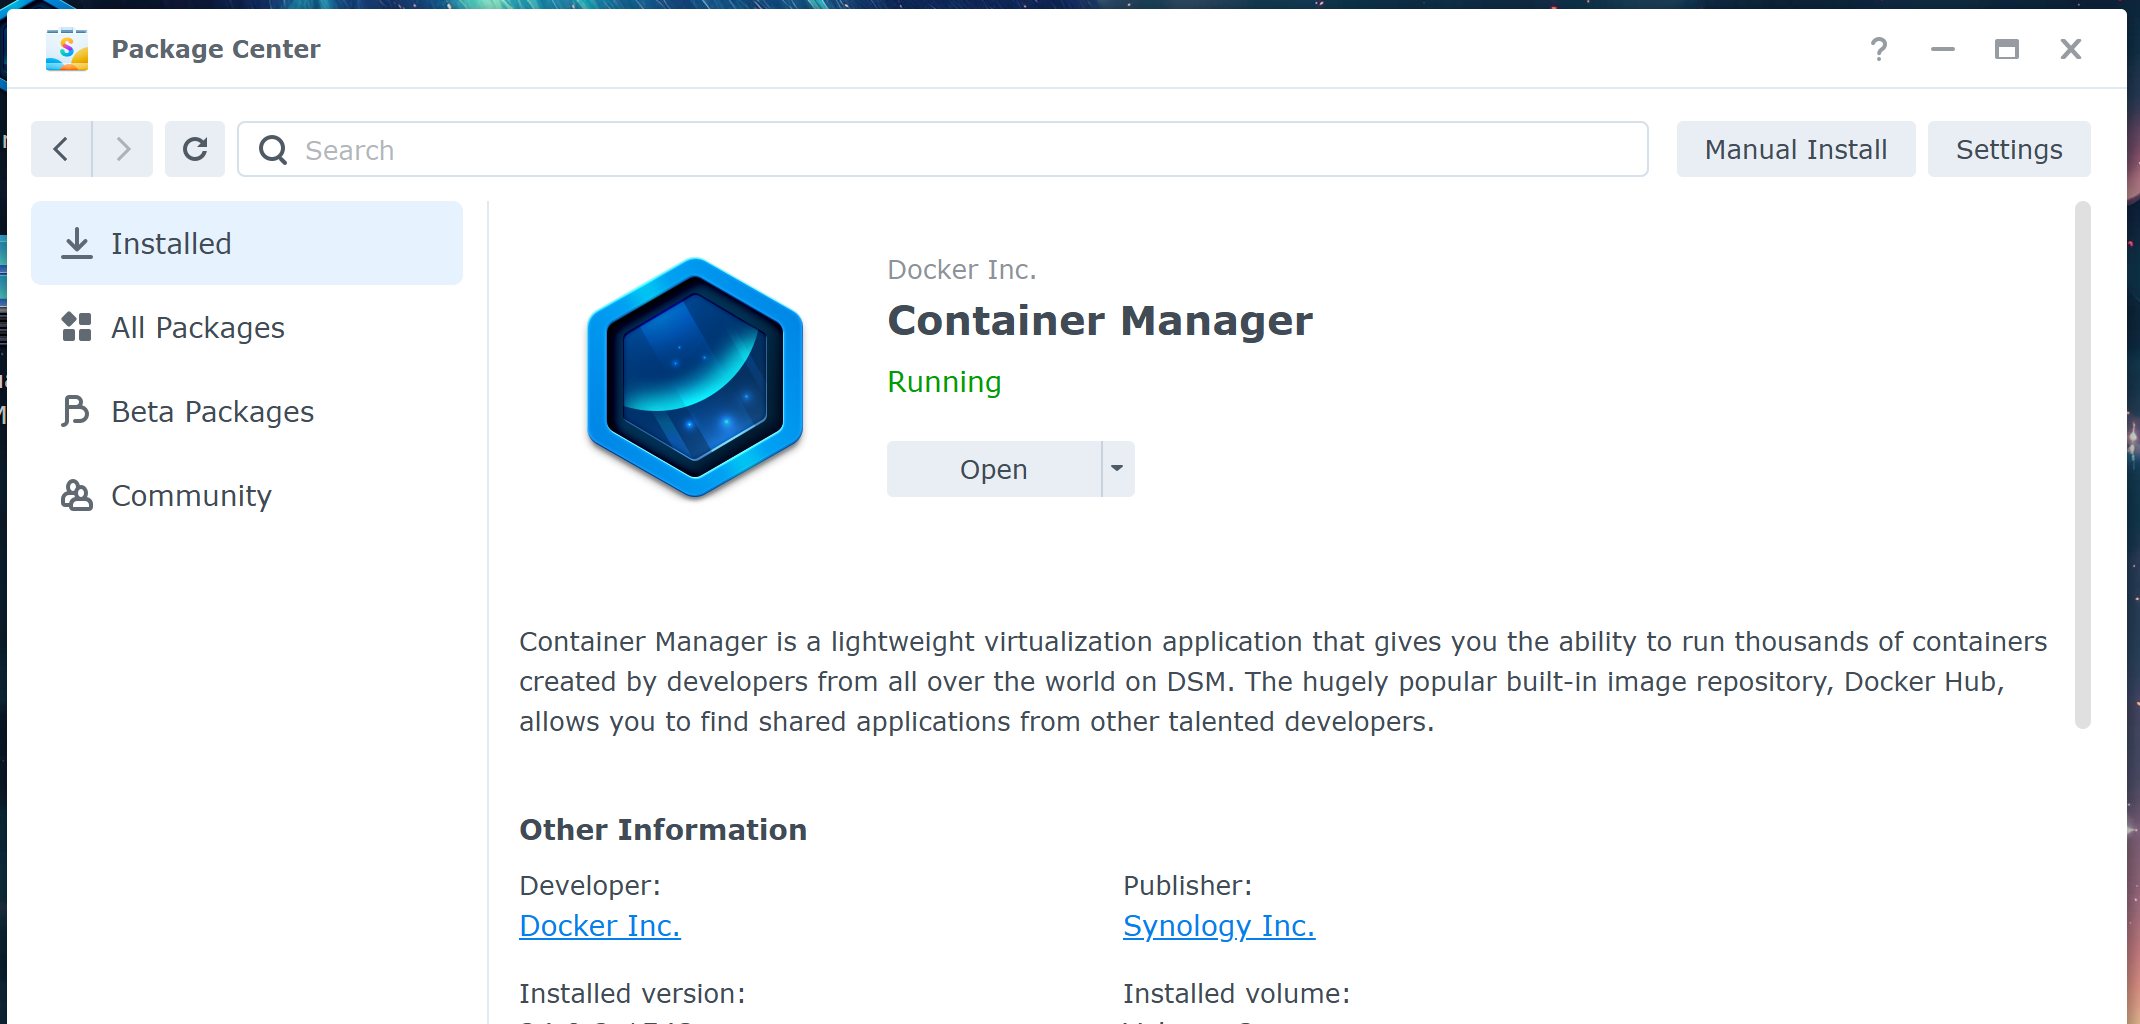
RustDesk provides its server as a Docker image. On compatible DiskStations, Docker is available as the “Container Manager” package (called “Docker” on DSM versions below 7.2). RustDesk conveniently offers a ready-to-use docker-compose.yml, so you don’t need to manually download and configure an image or build your own compose file.
Before starting, install the Container Manager on your DiskStation if you haven’t already.
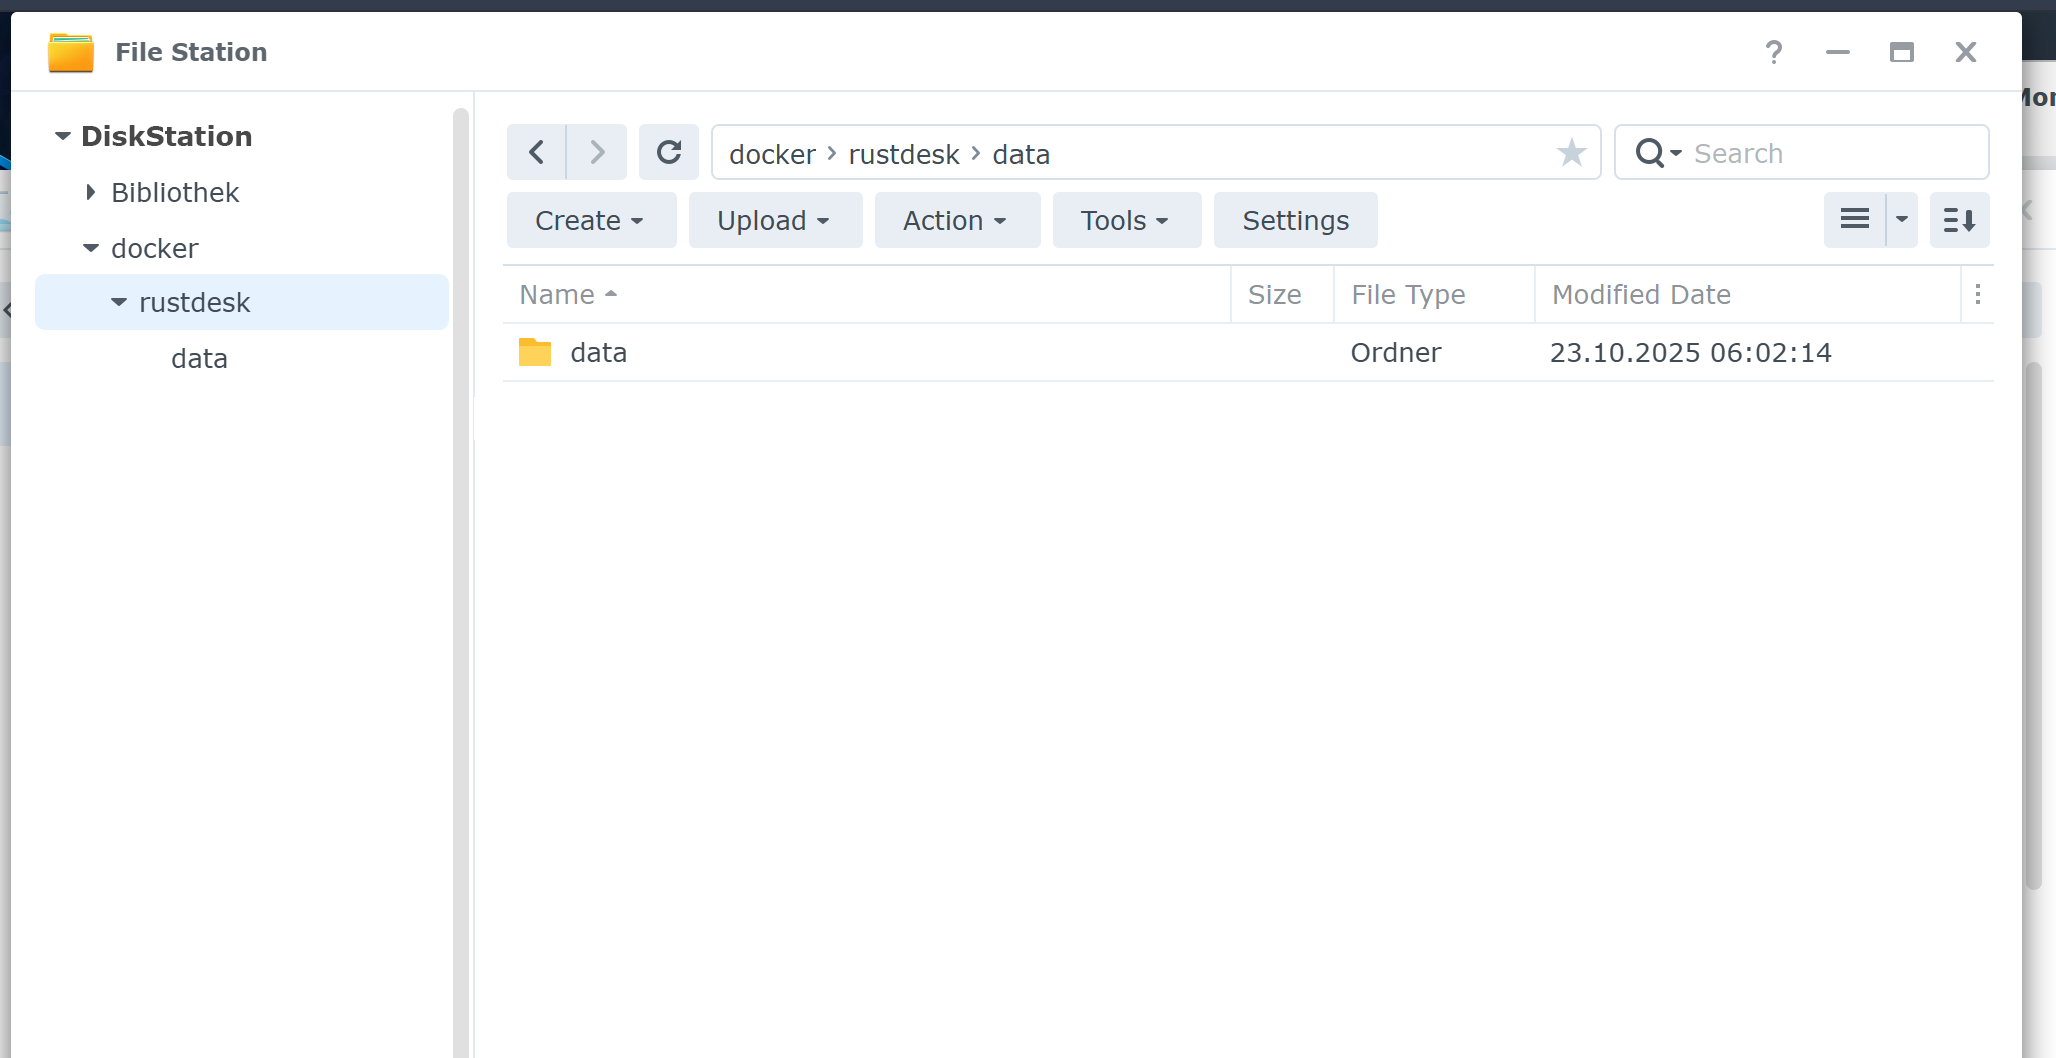
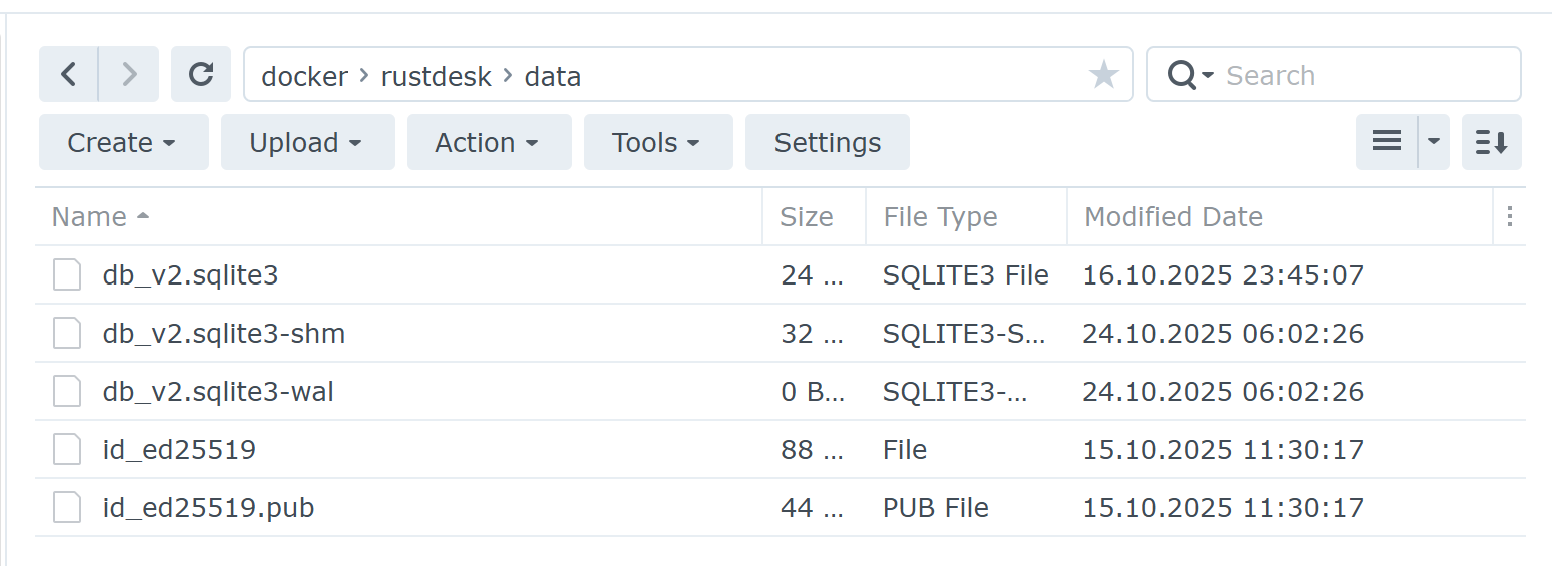
The Container Manager creates a shared folder /docker. Inside it, create a folder named rustdesk, and within that, a folder named data.
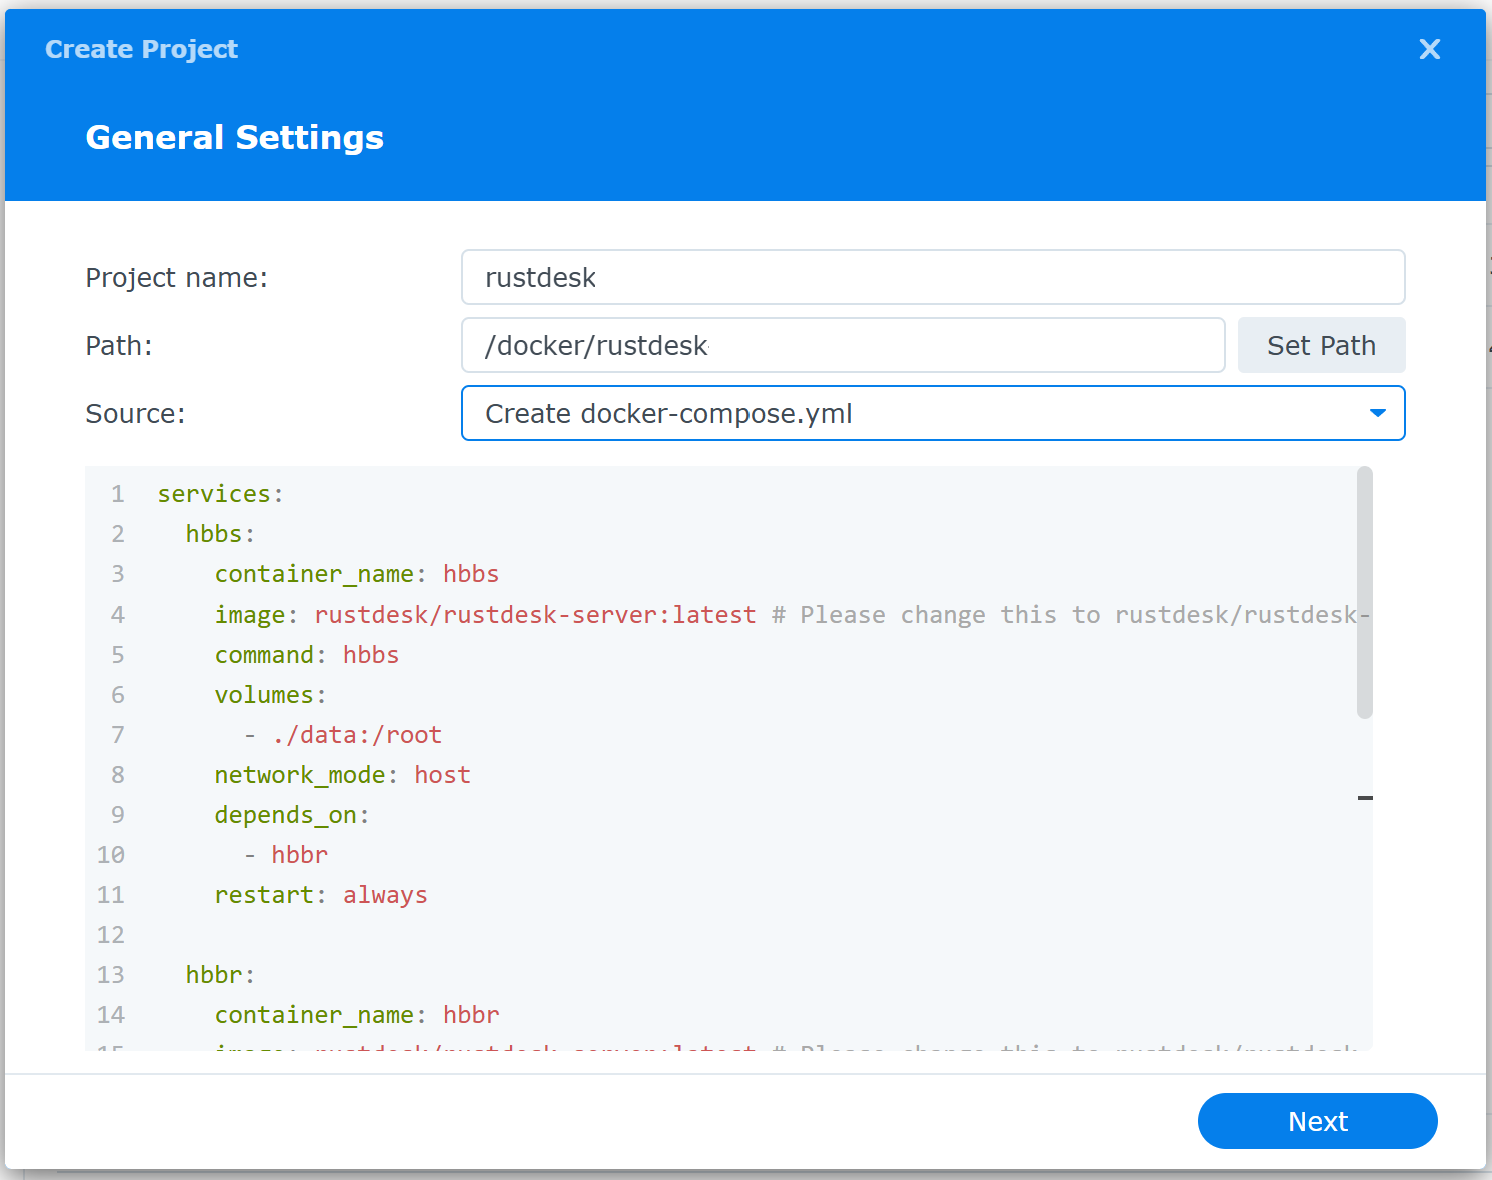
Open the Container Manager, click on Project > Create. Assign a name to the container and select /docker/rustdesk as the path. Choose “Create docker-compose.yml” as the source and paste the following lines into the editor:
services:
  hbbs:
    container_name: hbbs
    image: rustdesk/rustdesk-server:latest # Please change this to rustdesk/rustdesk-server-pro:latest if you want to install Pro.
    command: hbbs
    volumes:
      - ./data:/root
    network_mode: host
    depends_on:
      - hbbr
    restart: always

  hbbr:
    container_name: hbbr
    image: rustdesk/rustdesk-server:latest # Please change this to rustdesk/rustdesk-server-pro:latest if you want to install Pro.
    command: hbbr
    volumes:
      - ./data:/root
    network_mode: host
    restart: always
Click Next, skip the web portal settings, and finish the dialog. The containers hbbr and hbbs will be created and started. If successful, you’ll find several files under /docker/rustdesk/data. The server is now ready.
DSM 6
If you’re still using DSM 6, you won’t have the Container Manager but the older Docker package, which doesn’t support Docker Compose. You’ll need to set up the containers manually via the GUI. RustDesk’s homepage provides a guide for this.
Firewall Configuration
If your DiskStation’s firewall is enabled (or if you use another firewall), you’ll need to allow the following ports:
- 21115 TCP
- 21116 TCP and UDP
- 21117 TCP
You can either allow access to these ports for the entire local network or restrict it to specific devices using RustDesk (both controlling and controlled devices).
Client Installation
Now install the RustDesk clients—on both the device you want to control and the one you’ll use to control it. The RustDesk client works bidirectionally.
Download the appropriate client here and install it.
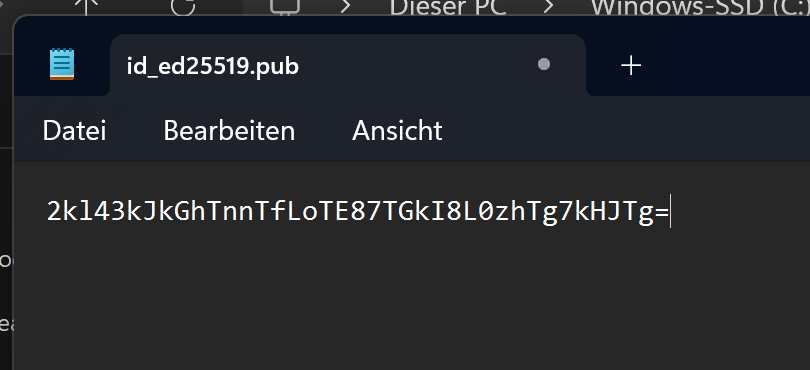
Communication between server and client is encrypted. The client needs the server’s public key, which you’ll find in the file id_ed25519.pub under /docker/rustdesk/data. Download or open it with your DiskStation’s text editor.
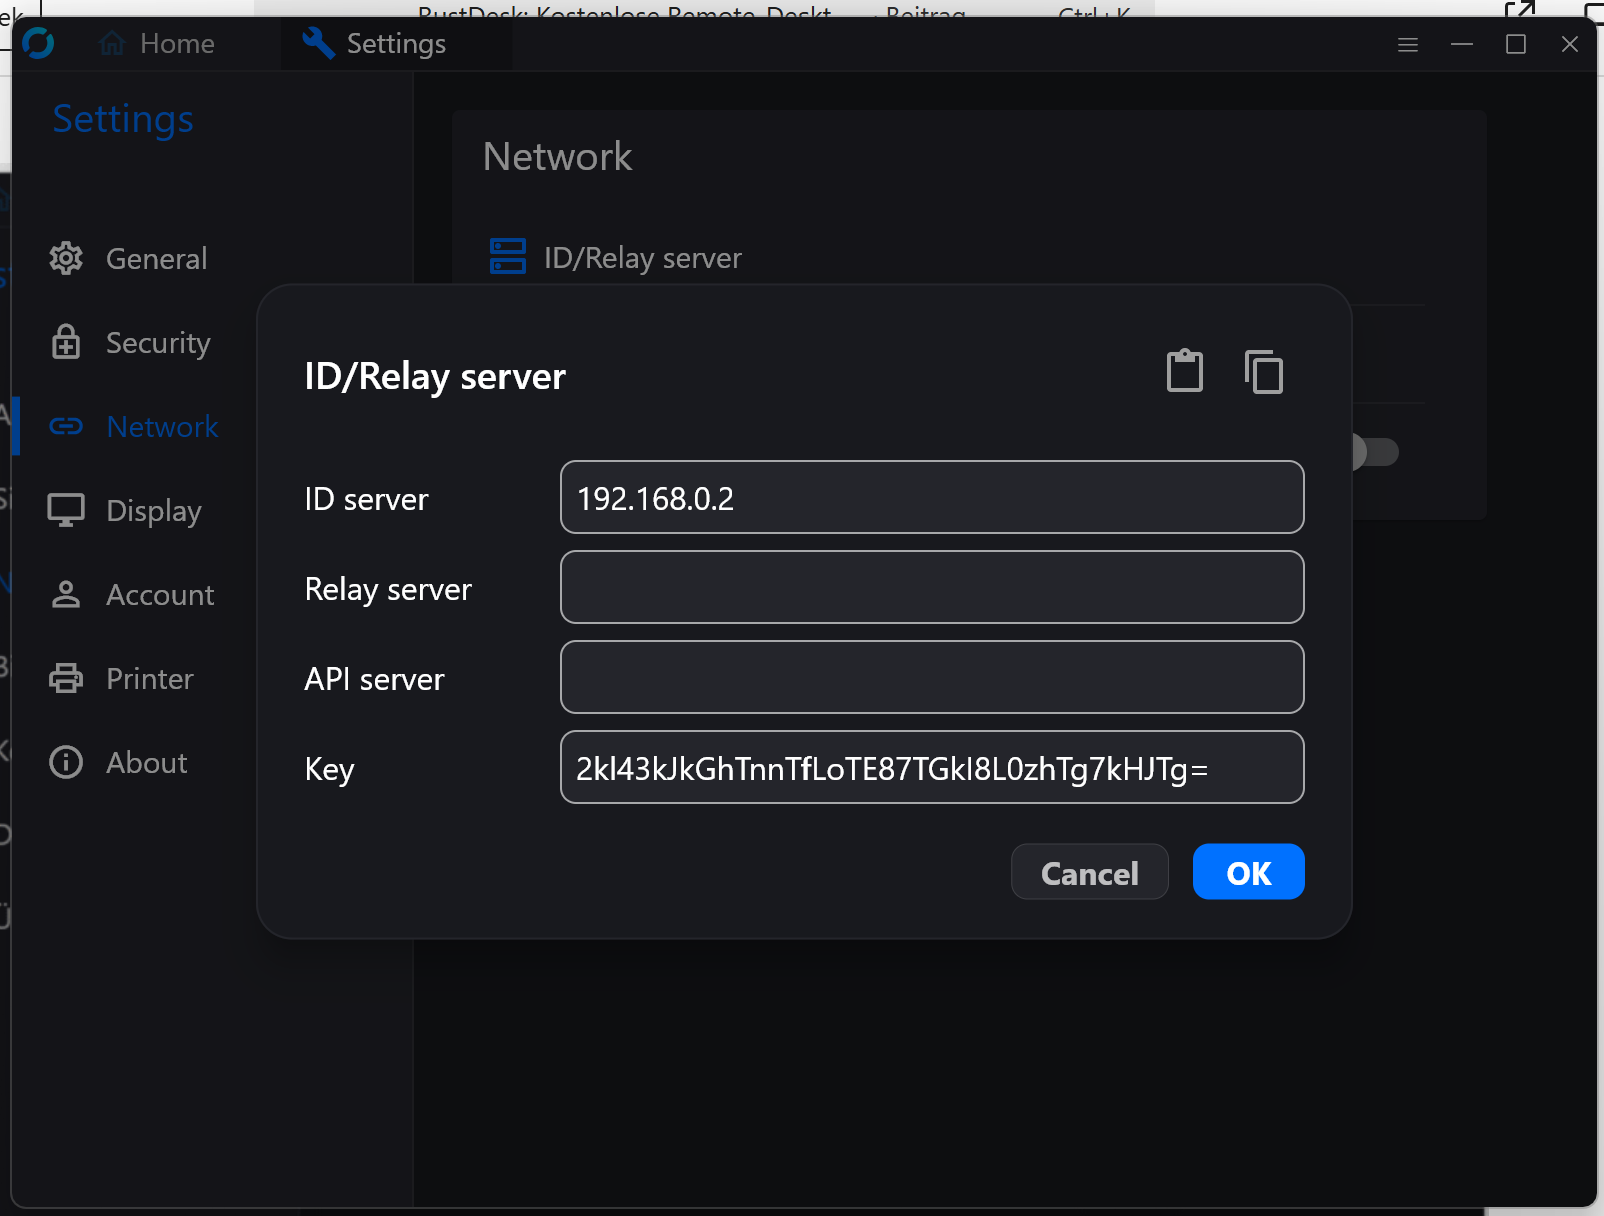
Start the client and open the settings (three lines in the menu bar). Go to Network > Unlock Network Settings > ID/Relay Server. Under “ID Server”, enter your DiskStation’s local IP address or domain. Under “Key”, paste the public key from the file. Confirm with OK.
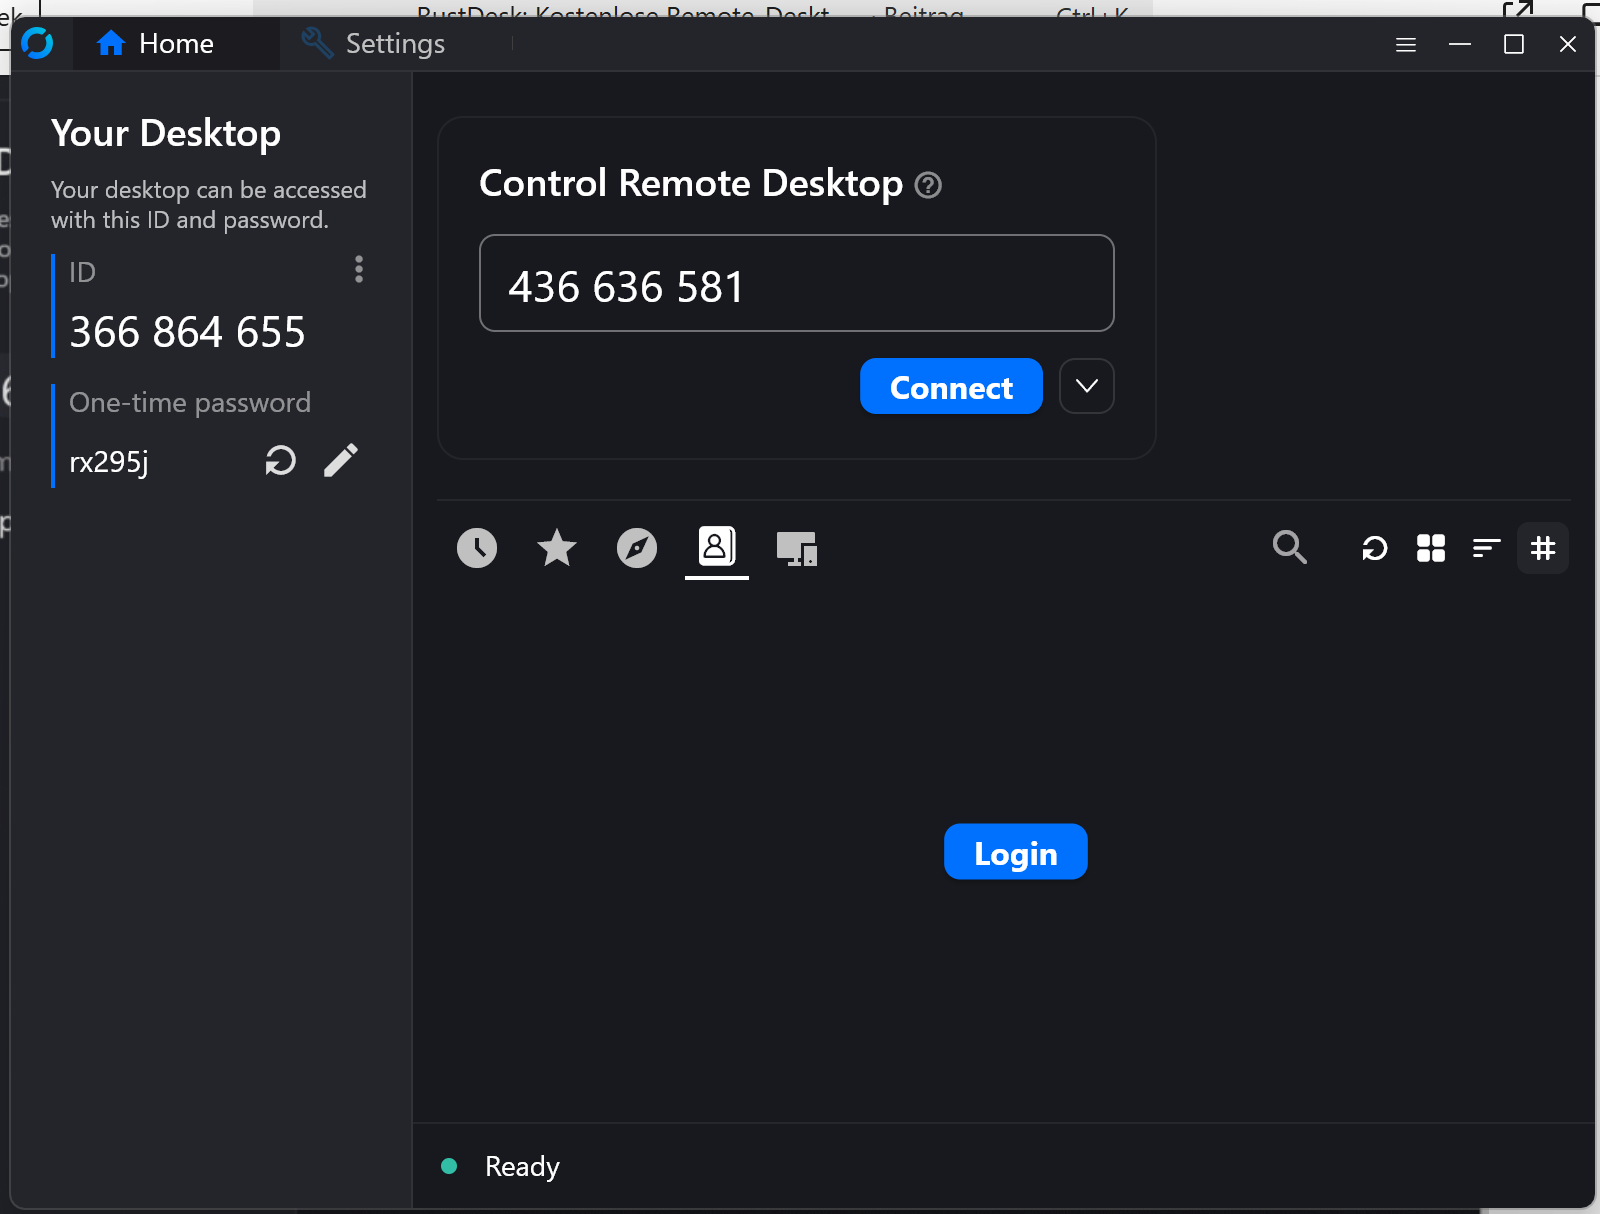
On the client’s home screen, you should now see “Ready” at the bottom—indicating successful server connection. If not, double-check your firewall settings.
Repeat the setup on the second device or any other devices you want to control or use for control.
Once both clients are configured, you can initiate a connection. Enter the ID shown on the controlled device into the controlling device’s client. The required password is also shown in the client.
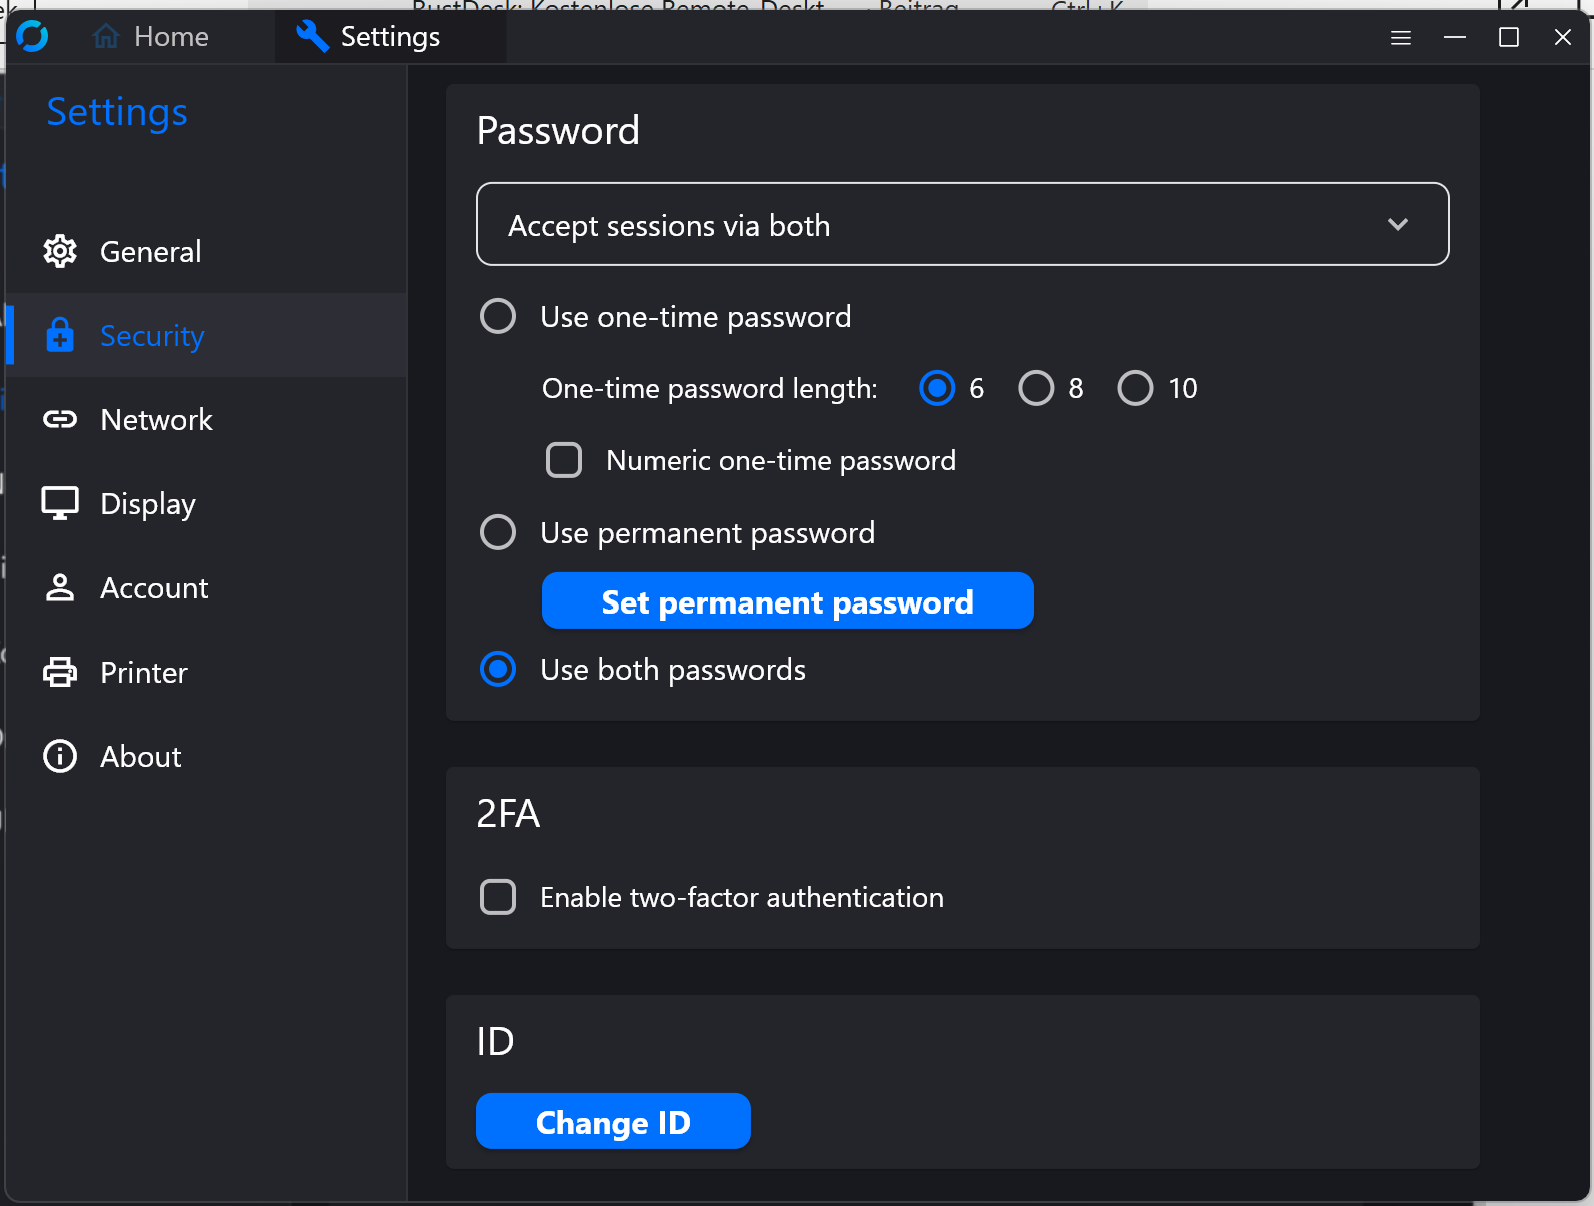
The password expires after the session ends. To avoid entering it each time, you can set a permanent password. On the controlled device, go to Settings > Security > Unlock Security Settings. Under “Password”, click “Set Permanent Password” and choose a secure password or passphrase. By default, both the generated and permanent passwords are active. To use only the permanent one, enable the corresponding option.
You can save the connection as a favorite. The client also displays all clients in the LAN.
Internet Access
To use RustDesk over the internet, you’ll need to open the required ports in your router. Additionally, allow access to those ports in your firewall—at least from your country.
Keep in mind: the RustDesk server runs in host mode, meaning it shares the same network layer as your DiskStation and its services/packages. This poses a security risk. If you plan to use RustDesk over the internet, it’s safer to use a VPN.
Related Posts
None found